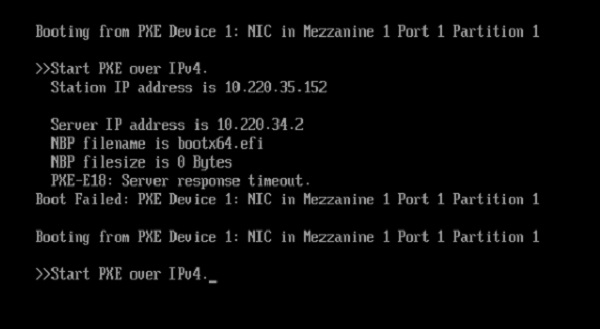
Do you have the same issue? Error when Start PXE Over IPV4 and how to repair it. What you need to know about skipping PXE and instead booting from a local disc.
Here, I’ve included a few of the best ways to get around the computer’s failure to Start PXE Over IPV4 after reading through a number of different postings on the topic. If you’re getting an error message when trying to Start PXE Over IPV4 and boot from your own hard drive, try each of the following until you get it right.
3 Methods to Fix the Error “Start PXE Over IPV4”

Method 1. Disabling Secure Boot
Some customers have reported that disabling secure boot has helped them fix the start PXE over IPv4 problem in Windows 10. The workaround should be tried first if the same error occurs.
Step 1. Restart your computer and enter the BIOS configuration menu by pressing a certain key (such as F2, Del, or Esc).
Step 2. Second, select the “Security” menu item. Click the radio button next to “Secure Boot Configuration,” and then press Enter.
Step 3. Next, press the right arrow key until the secure boot option is highlighted, and then press Enter.
Step 4. Change the boot mode to Legacy BIOS by selecting it from the menu under Boot Mode or UEFI Boot Mode.
Step 5. Fifth, after making any necessary adjustments, exit the BIOS setup menu by using the F10 key.
Method 2. Alter the Boot Sequence in the BIOS
The Start PXE over IPv4 problem could occur if LAN is prioritised in the boot order. In that scenario, you can follow these instructions to change the boot order in the BIOS and make the system disc the first boot choice.
Step 1. First, restart your computer and access the BIOS setup by pressing a certain key.
Step 2. Second, in the BIOS, select the Boot menu. You can prioritise which drive is used to start the computer by using the up and down arrow keys.
Step 3. Press F10 to save the changed boot sequence and restart the machine.
The Start PXE over IPv4 problem notice should disappear after the boot order has been changed.
Method 3. Turn off Wake-On-LAN in BIOS
Disabling Wake-On-LAN in the BIOS may be worth a go if neither of the previous two suggestions does the trick.
Step 1. First, power down your computer and reboot into the BIOS settings menu.
Step 2. Second, look under the advanced options of your motherboard’s BIOS, or the Power or Advanced settings tab.
Step 3. Third, from the menu, disable Wake-On-LAN by clicking on it.
Step 4. Once you’ve made the necessary adjustments, hit “F10” to save your work and restart your machine.
If, upon powering on your PC, you see the message “checking media presence, media present, start PXE over IPv4”, you can implement one of the aforementioned workarounds.
Conclusion
The start PXE via IPv4 issue notice should be resolved after reading this post. Which approach has proven successful for you? Do you know of a more effective approach? Having you present it to us is a great honour.


