The “The Disk Check Could Not be Performed Because Windows Cannot Access the Disk” message can appear out of nowhere. This error message typically occurs in Windows Explorer, but it can be brought on by inappropriate actions, malware, or even a bad power connection. But there is a solution to this issue.
How to Fix: The Disk Check Could Not be Performed Because Windows Cannot Access the Disk Error.
Method 1: Initially, Make Sure Your Drives are Properly Connected.
Foremost things first, check the connections between your storage devices and the computer. If you’re having trouble with an external hard drive, consider disconnecting it or attempting to connect it to a different USB port.
Your computer needs to be restarted now. If that fails, you might try hooking up your storage device to different computers.
Method 2: Adjust the Drive Letter
Changing the drive letter of the hard drive can occasionally solve the Windows cannot access the disc error.
Step 1. For the Win + X menu, hit the corresponding keys on your keyboard.
Step 2. Pick Disk Management from the menu.
Step 3. A catalogue of your computer’s storage devices can be viewed in the Disk Management window.
Step 4.Right-click on your hard drive’s entry in the list to access its menu of options.
Step 5. Alter the Drive Letter and Paths by selecting the link.
Step 6. Then, select the drive letter you want to use and select Change.
Step 7. You can change the drive letter by clicking on the drop-down menu and selecting a different letter.
When you’re done, your computer will need to be restarted.
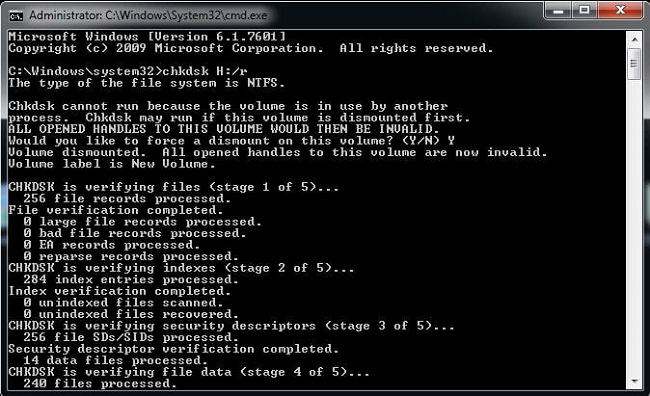
Method 3: Use the Command Prompt to initiate a Disc Check.
Try running chkdsk scan if you’re still getting a “Windows cannot reach the drive” issue. Remember, too, that if chkdsk tries to fix damaged sectors, the data on that drive could be lost.
Step 1. To launch Command Prompt as an administrator, hit the Start button, navigate to Programs and Accessories, and then click the right arrow next to the command prompt icon.
Step 2. Press Enter after typing command followed by the letter of the drive in Command Prompt.
Step 3. chkdsk /r then hit enter (in the event that you are prompted to dismount and schedule chkdsk on next restart, press Y and press enter).
Step 4.Basically, you need to restart your machine.
Step 5. There is nothing else you need to do.
Final Thoughts
Have you attempted any of the solutions we suggested? Is “The disc check could not be done because Windows cannot access the disc” no longer an issue for you following the implementation of the suggested solutions?
Please use the space below to ask questions or provide feedback about the aforementioned changes. Thanks for reading our article The Disk Check Could Not be Performed Because Windows Cannot Access the Disk. Continue reading and have a good day.


